MyTardis Prerequisites
These instructions are for MyTardis server administrators who wish to support uploads from MyData.
MyData App for MyTardis
MyData requires the “mydata” MyTardis app to be installed on the MyTardis server. This app, and its installation instructions can be found here: https://github.com/mytardis/mytardis-app-mydata/blob/master/README.md
You should use the HEAD of the master branch of “mytardis-app-mydata”, i.e.
$ cd tardis/apps/
$ git clone https://github.com/mytardis/mytardis-app-mydata mydata
$ cd mydata
MyData stores metadata for each experiment it creates, including a reference to the MyData instance (uploader) which created the experiment, and the name of the user folder the experiment was created for. A schema must be added to MyTardis to support this:
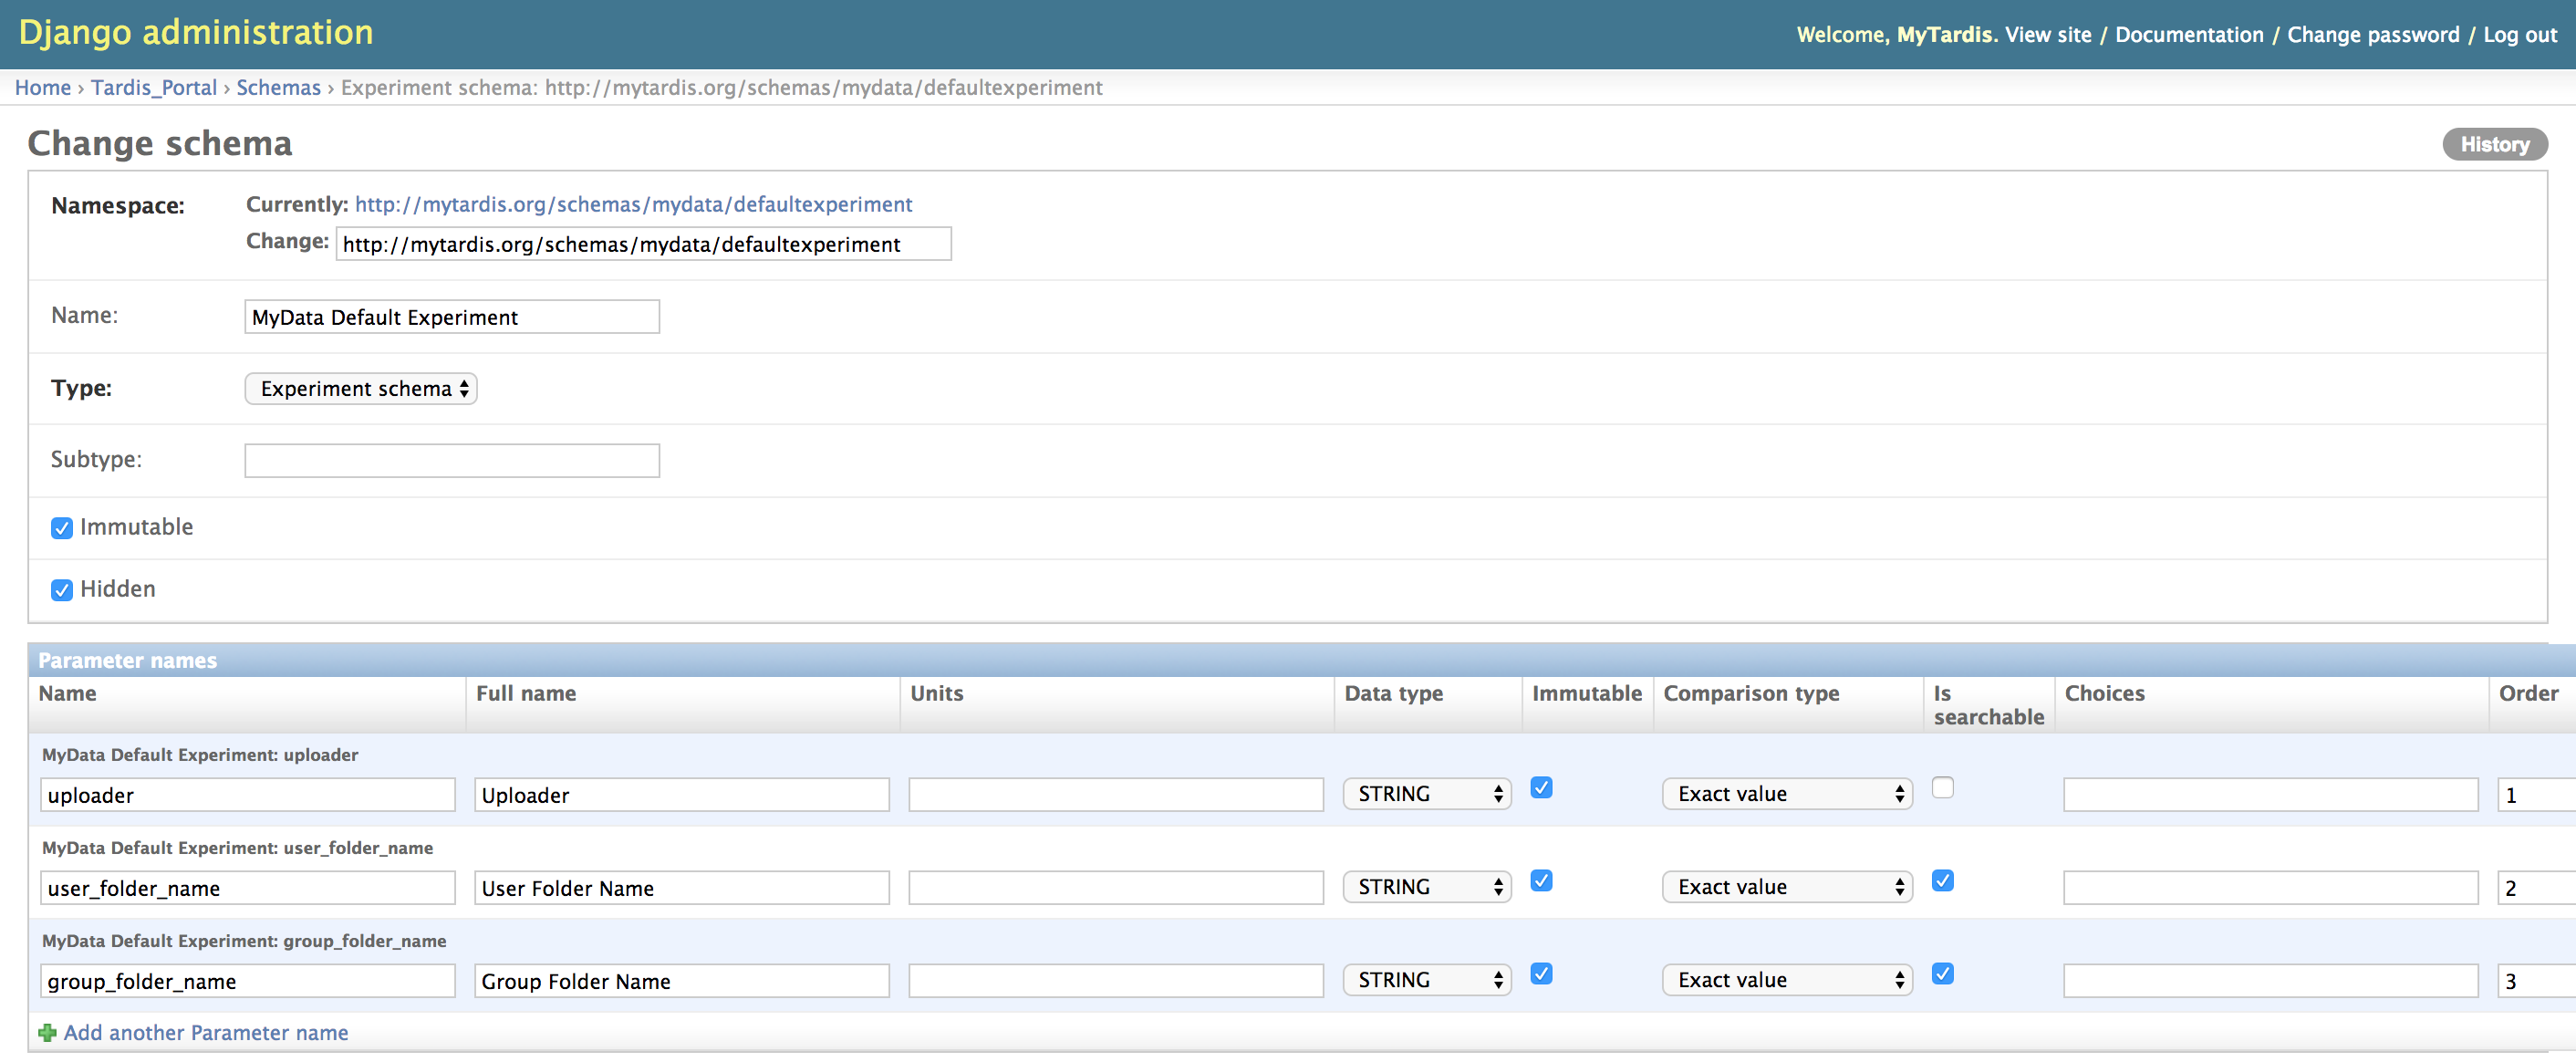
The final step of the instructions in https://github.com/mytardis/mytardis-app-mydata/blob/master/README.md describes how to create this schema, which is just a matter of running:
python mytardis.py loaddata tardis/apps/mydata/fixtures/default_experiment_schema.json
after installing the “mytardis-app-mydata” MyTardis app in “tardis/apps/mydata”.
MyData requires the use of a “receiving” storage box (also know as a “staging” storage box) in MyTardis, which serves as a temporary location for uploaded files. MyTardis will automatically create a storage box if a client like MyData attempts to perform staging uploads via the API. To enable uploads via staging (using SCP) in MyData, which are recommended over HTTP POST uploads, it is necessary to add the “scp_username” and “scp_hostname” attributes to the storage box, as illustrated below.
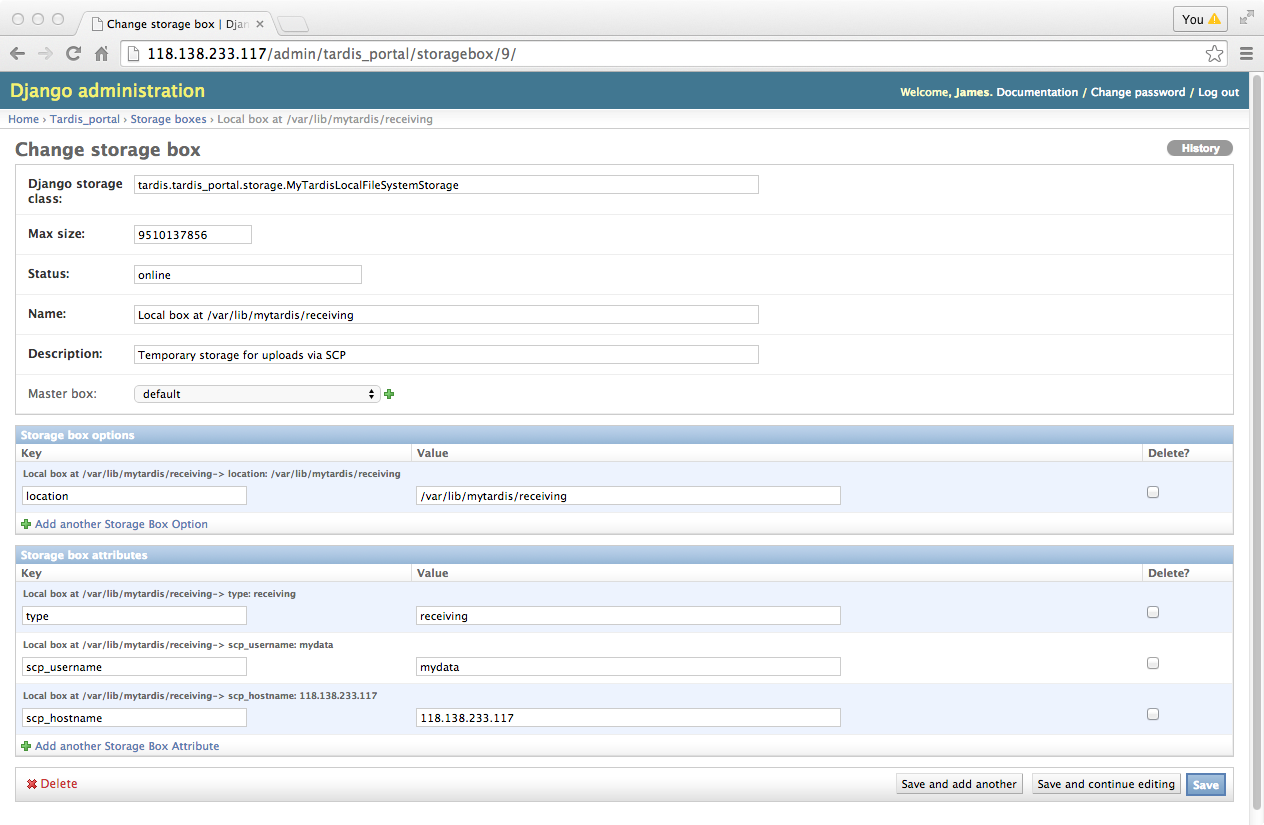
DEFAULT_RECEIVING_DIR in tardis/settings.py should be set to match the location option of the “staging” (or “receiving”) storage box, e.g. “/var/lib/mytardis/receiving”. Similarly, DEFAULT_STORAGE_BASE_DIR in tardis/settings.py should be set to match the location option of the “master” storage box, which is called “default” above.
For more information on uploads via staging, see see SCP to Staging.
Creating a MyTardis User Account for MyData
The first time MyData is launched, a blank Settings dialog will appear, requiring a MyTardis username and an API key for that user account. The API key is saved to disk along with MyData’s other settings to allow unattended uploads (see Saving and Loading Settings). While performing unattended uploads, MyData creates experiments, datasets and datafiles using MyTardis’s RESTful API.
The MyTardis user account supplied to MyData should be a member of the facility managers group for the facility specified in MyData’s Settings dialog, and it should have the following permissions, which can be set in MyTardis’s Django Admin interface:
- tardis_portal.add_datafile
- tardis_portal.add_dataset
- tardis_portal.change_dataset
- tardis_portal.add_experiment
- tardis_portal.change_experiment
- tardis_portal.add_instrument
- tardis_portal.change_instrument
- tardis_portal.add_objectacl
Rather than manually adding permissions each time you create a MyTardis account to use with MyData, you can create a “mydata-default-permissions” group or a “facility-manager-default-permissions” group and add new MyData user accounts to the existing group to inherit some sensible default permissions. Below, we can see that the role account “testfacility” is a member of two groups, “facility-managers” and “test_facility_managers”. The “facility-managers” group contanis sensible default permission to be inherited, and the “test_facility_managers” group membership grants the “testfacility” account access the “Test Facility” facility.

