MyData Tutorial
Recent Changes
Previous versions of this tutorial used a MyTardis demo server which provided an easy way to install a local MyTardis test server running an appropriate version of MyTardis for MyData. Now that MyData is compatible with MyTardis’s official “develop” branch, it is no longer necessary to provide easy ways to install the unofficial fork of MyTardis which was previously used with MyData.
It is still possible to run through this tutorial with a local MyTardis test server. Testing MyData’s staging uploads is best done with a real remote MyTardis server. But the majority of MyData’s functionality (as described below) can be tested against a local MyTardis test server.
Installing MyTardis and running a local test server is beyond the scope of this tutorial. For more information, see https://github.com/mytardis/mytardis/blob/develop/build.sh and ask for help if needed.
For anyone wishing to work through this tutorial interactively, it will be assumed that you know how to set up a MyTardis test server, accessible at http://127.0.0.1:8000/
Logging into the MyTardis Test Server as a MyTardis administrator
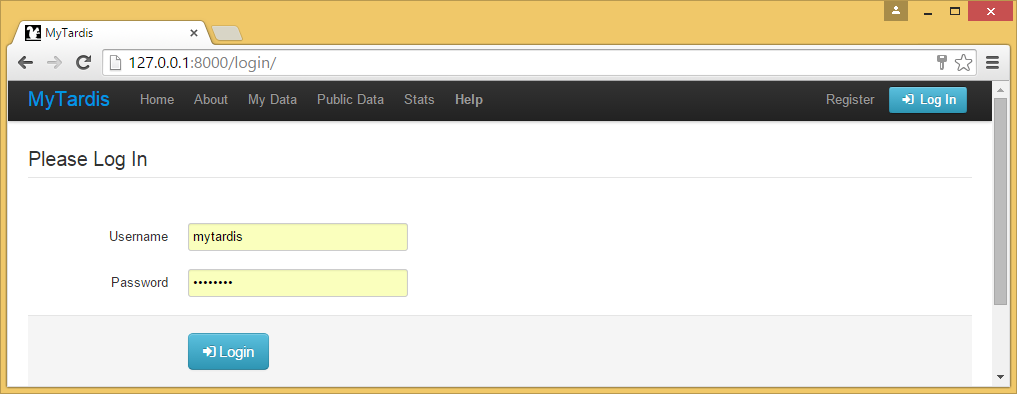
Click the “Log In” button in the upper right corner, and log in with username “mytardis” and password “mytardis”.
Accessing MyTardis’s Django Admin Interface
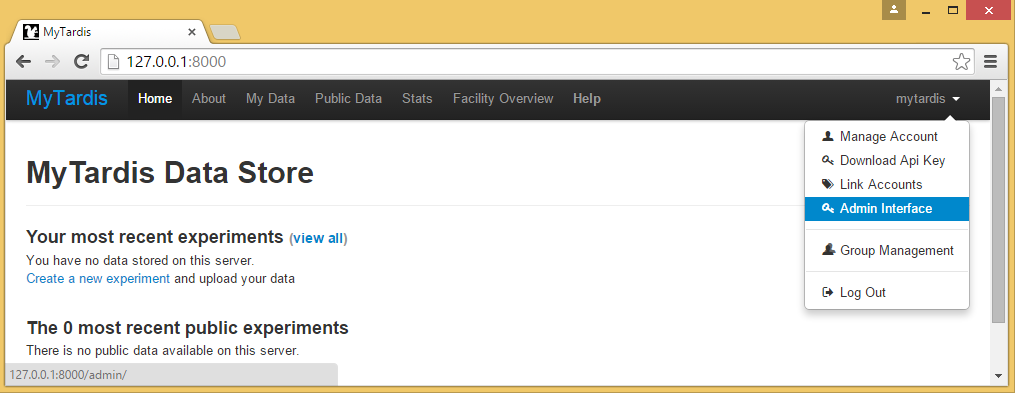
The “mytardis” account in this test server is a super administrator, i.e. it can do anything, including accessing MyTardis’s Django Admin interface from the menu item shown below.
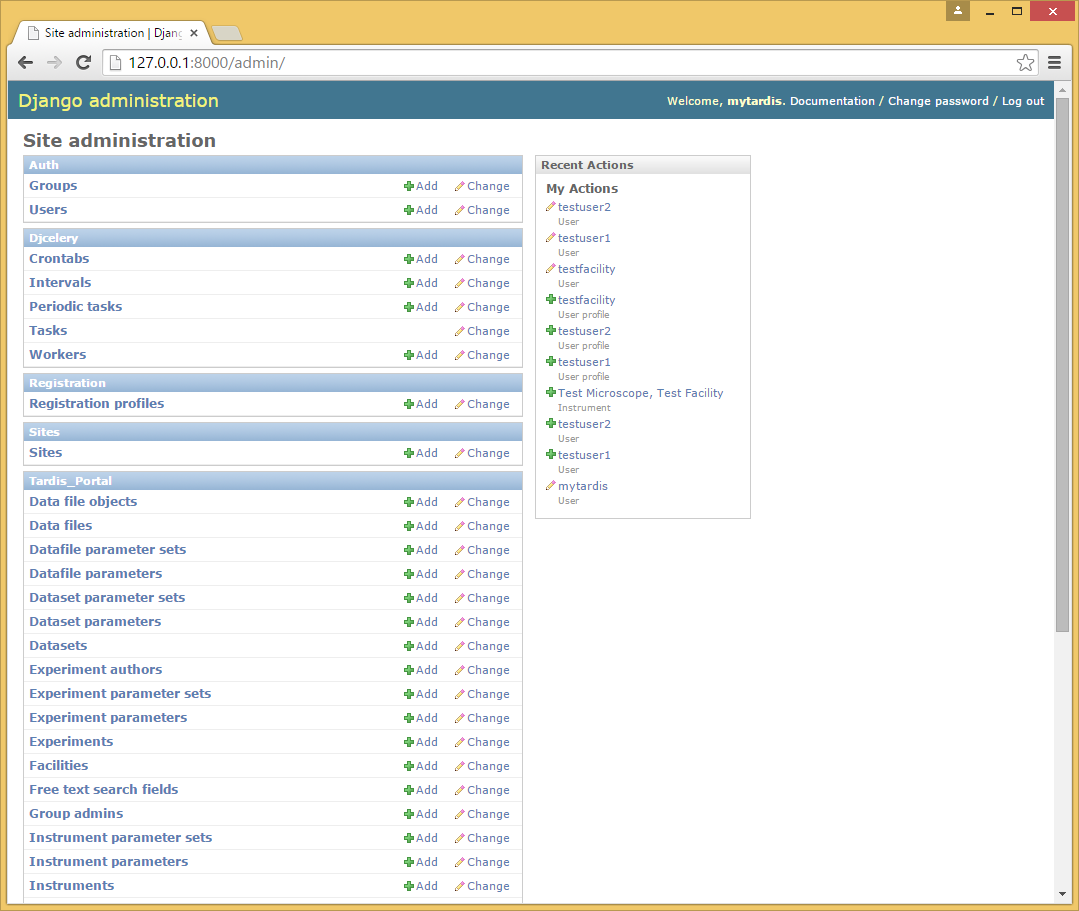
MyTardis’s Django Admin interface looks similar to many other Django applications’ admin interfaces. Keep in mind that this interface is extremely powerful, so if you are not careful, you could delete database records without any way to recover them!
Facilities Registered in MyTardis
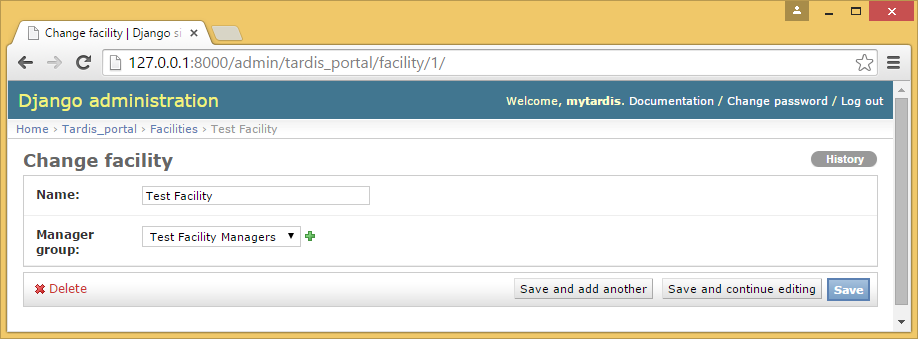
From the Django Admin interface, click on “Facilities” to see what facilities are available in this Test Server. There is only one facility, named “Test Facility”.

Click on the “Test Facility” facility record to see the properties of the facility, including the “Test Facility Managers” user group assigned to the “Manager group” field of the facility record.
User Accounts in MyTardis
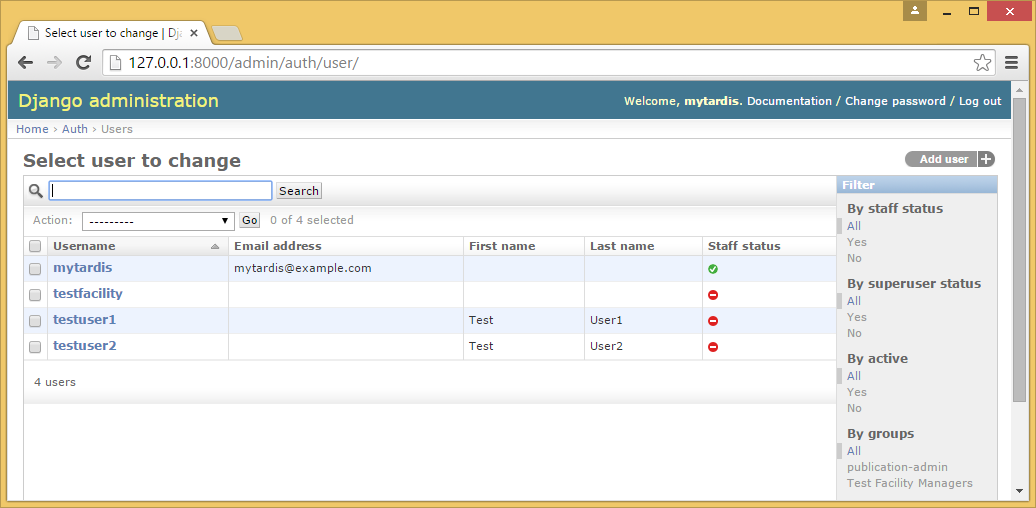
From the Django Admin interface, click on Users to see the user accounts available in this MyTardis server. The “mytardis” administrator is the only account which can access the Django Admin interface.
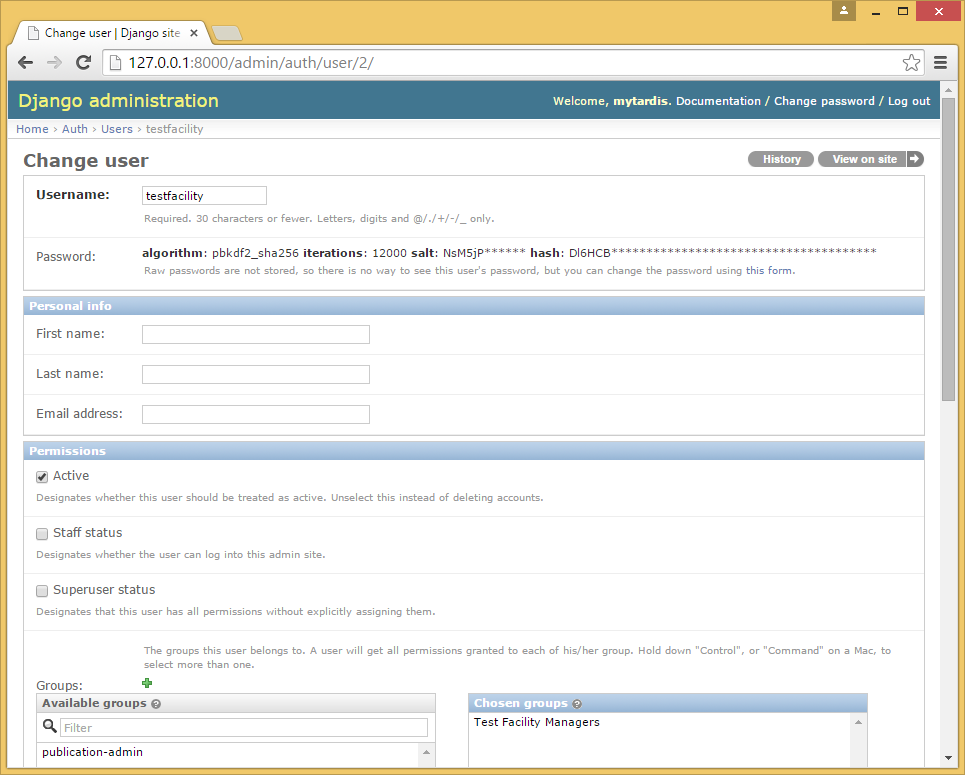
Click on the “testfacility” user account to see its attributes. Note that this account is a member of the “Test Facility” facility record’s manager group, named “Test Facility Managers”.
Logging into the MyTardis Test Server as a MyTardis facility manager
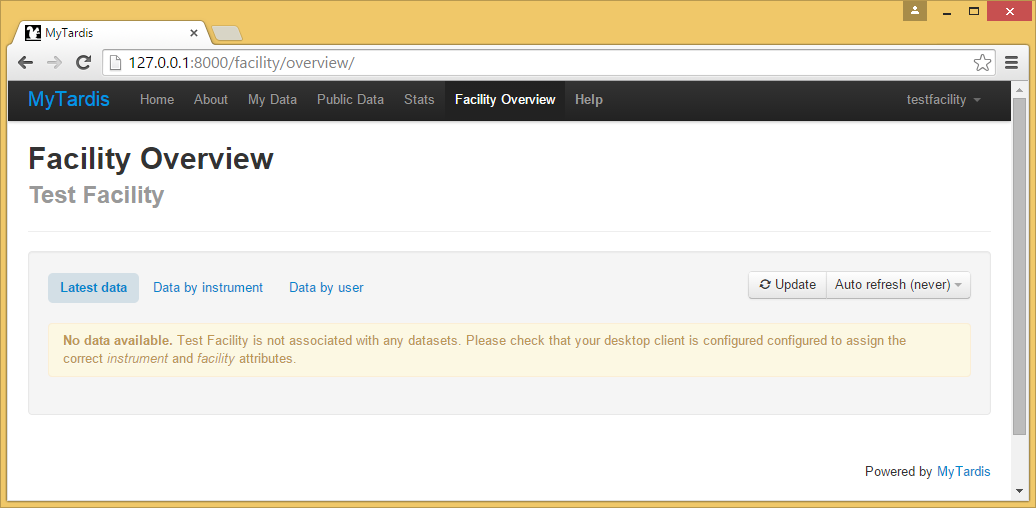
Log out of the Django Admin interface, and then return to the original URL in your web browser’s address bar, i.e. http://127.0.0.1:8000/, not http://127.0.0.1:8000/admin/. Then log in with username “testfacility” and password “testfacility”, and click on the “Facility Overview” section link in the navigation bar at the top of the MyTardis home page. Since we haven’t uploaded any data yet, no data will appear in the Facility Overview, but we can confirm that the “testfacility” account has access to the Facility Overview for the “Test Facility” facility.
Obtaining the demo data
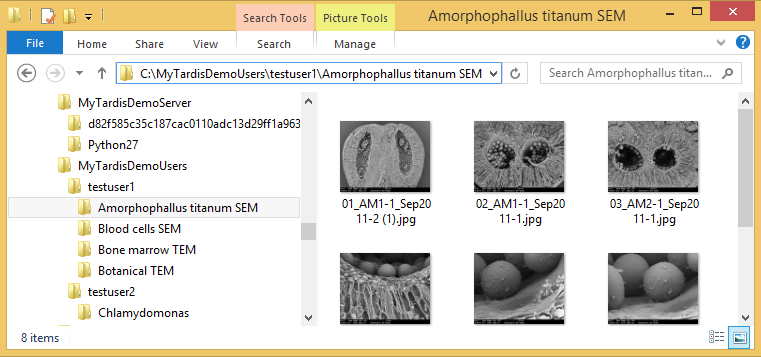
Download MyTardisDemoData.zip and extract it in “C:" to create the “C:\MyTardisDemoUsers” folder shown below:
Launching MyData
MyData can be downloaded from here: http://mydata.readthedocs.org/en/latest/download.html
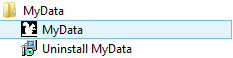
Open the downloaded executable and proceed through the setup wizard to install MyData. A shortcut to MyData will then be available in the Start Menu (or the Start Screen if not using a Start Menu):
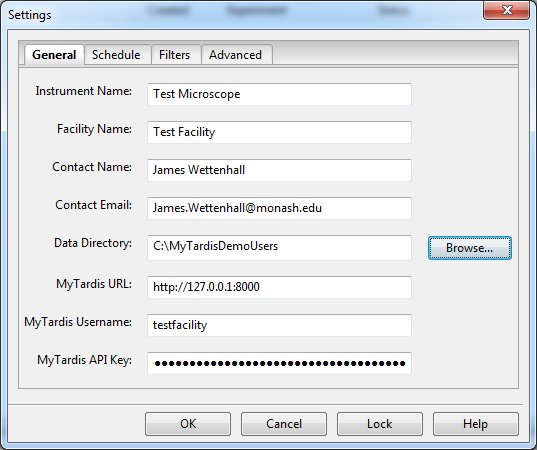
The first time you launch MyData, its settings dialog will appear automatically and appear blank:

Downloading and installing the demo configuration for MyData
Download MyDataDemo.cfg onto your Desktop and drag and drop it onto MyData’s settings dialog, which should automatically populate the fields in MyData’s settings dialog.
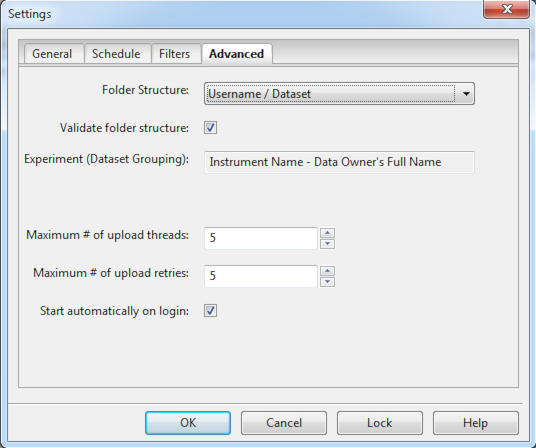
The Advanced tab of MyData’s settings dialog contains additional settings:
MyData’s Settings Validation
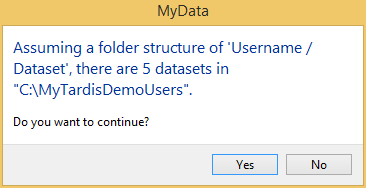
After clicking “OK” on the settings dialog, MyData will validate the settings and inform the user of any problems it finds. When running in interactive mode, MyData will then inform the user of how many datasets it has counted within the data directory and ask the user to confirm that they want to continue.
MyData’s Upload Methods
MyData offers two upload methods:
- HTTP POST
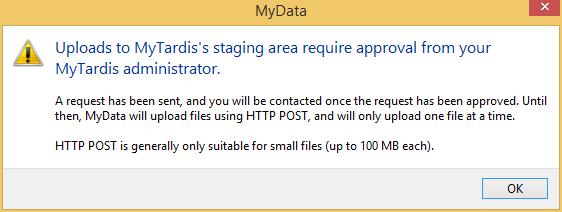
- SCP to Staging
The second method (“SCP to Staging”) can handle much larger datafiles and supports multiple concurent upload threads, however it is slightly more complicated to set up, so we won’t be covering it in this tutorial. Instead, we will stick with MyData’s default upload method (“HTTP POST”) and ignore the warning dialog below.
MyData’s Folders View
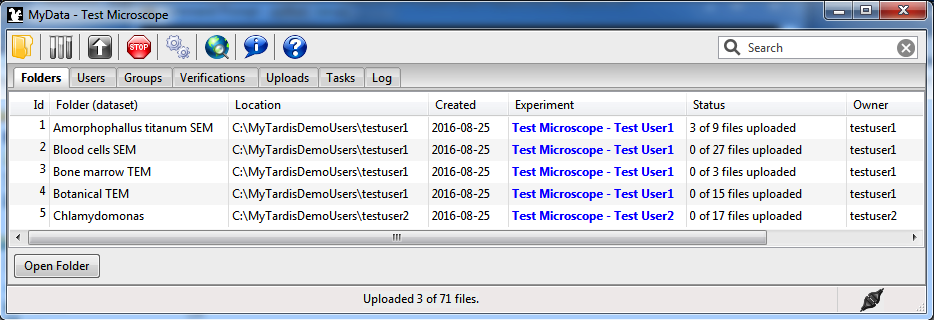
MyData’s Folders view lists all of the dataset folders which will be scanned for files to upload to MyTardis. For each folder, MyData displays a count of the total number of files in that folder, and the number of files which have already been uploaded to MyTardis. MyData is stateless, i.e. it won’t remember how many files were confirmed to be on MyTardis last time it was run, so each count will begin at zero and then increment by one as each file is confirmed to be available on MyTardis.
MyData’s Users View
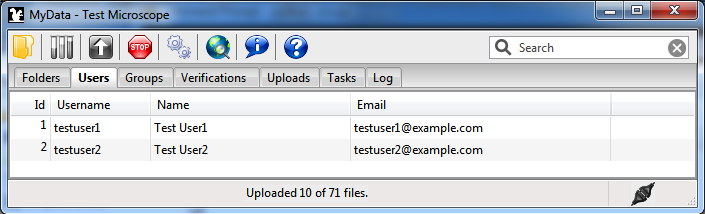
MyData’s Users view (below) displays the result of MyData’s attempt to map the user folder names (“testuser1” and “testuser2”) to MyTardis user accounts. In this case, both user folder names have been successfully mapped to user accounts on our MyTardis Test Server, but no email address has been recorded for either account in MyTardis. Many queries MyData performs against MyTardis will only work if the MyTardis account you entered in MyData’s settings dialog (“testfacility”) has sufficient permissions assigned to it, as shown on the Django Admin’s user account attributes page for the “testfacility” account. In this case, the “testfacility” account can access other users’ email addresses because it is a member of a Facility Managers group in MyTardis.
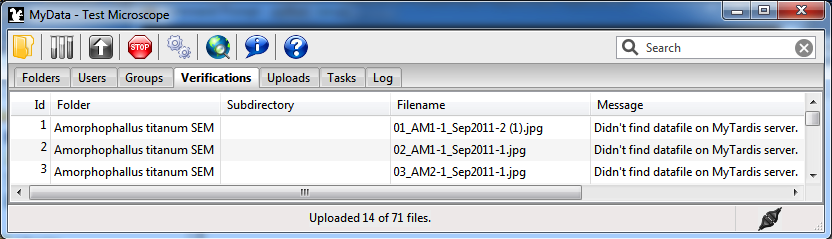
MyData’s Verifications View
MyData’s Verifications view (below) shows MyData’s attempts to verify whether each datafile is available on the MyTardis server, or whether it needs to be uploaded.
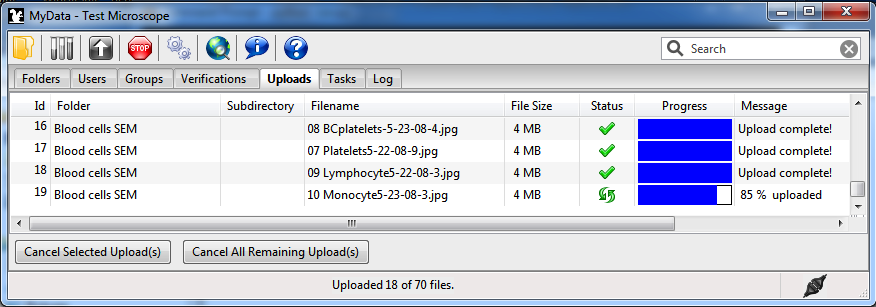
MyData’s Uploads View
MyData’s Uploads view (below) shows MyData’s upload progress. The default HTTP POST method only supports one concurrent upload, whereas the “SCP to Staging” upload method supports multiple concurrent uploads.
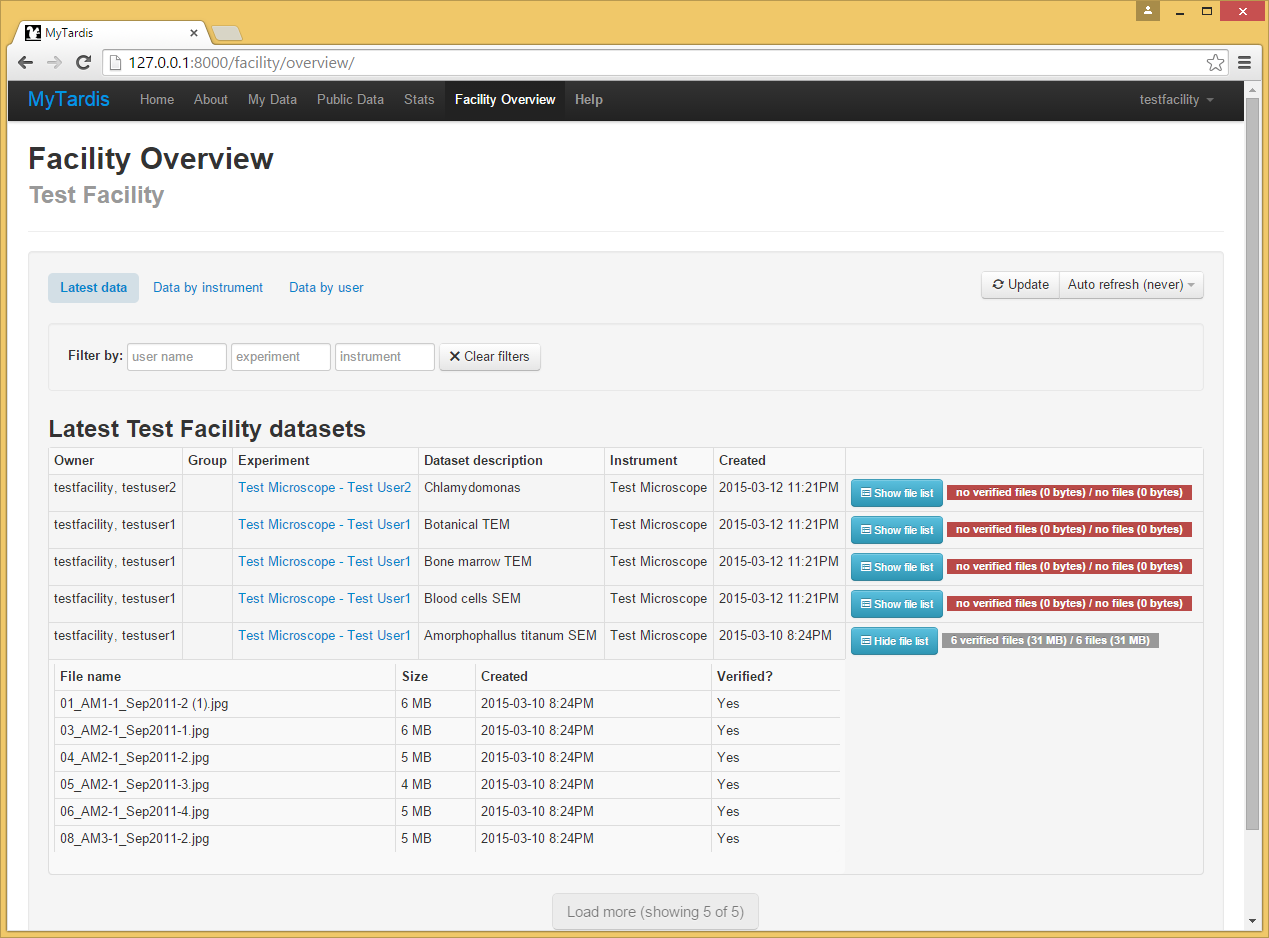
Monitoring MyData Uploads in MyTardis’s Facility Overview
After some of the datafiles have completed uploading, you can check back in your web browser to see the datafiles in MyTardis’s Facility Overview (below). You should be logged into MyTardis as the “testfacility” account (username “testfacility”, password “testfacility”).
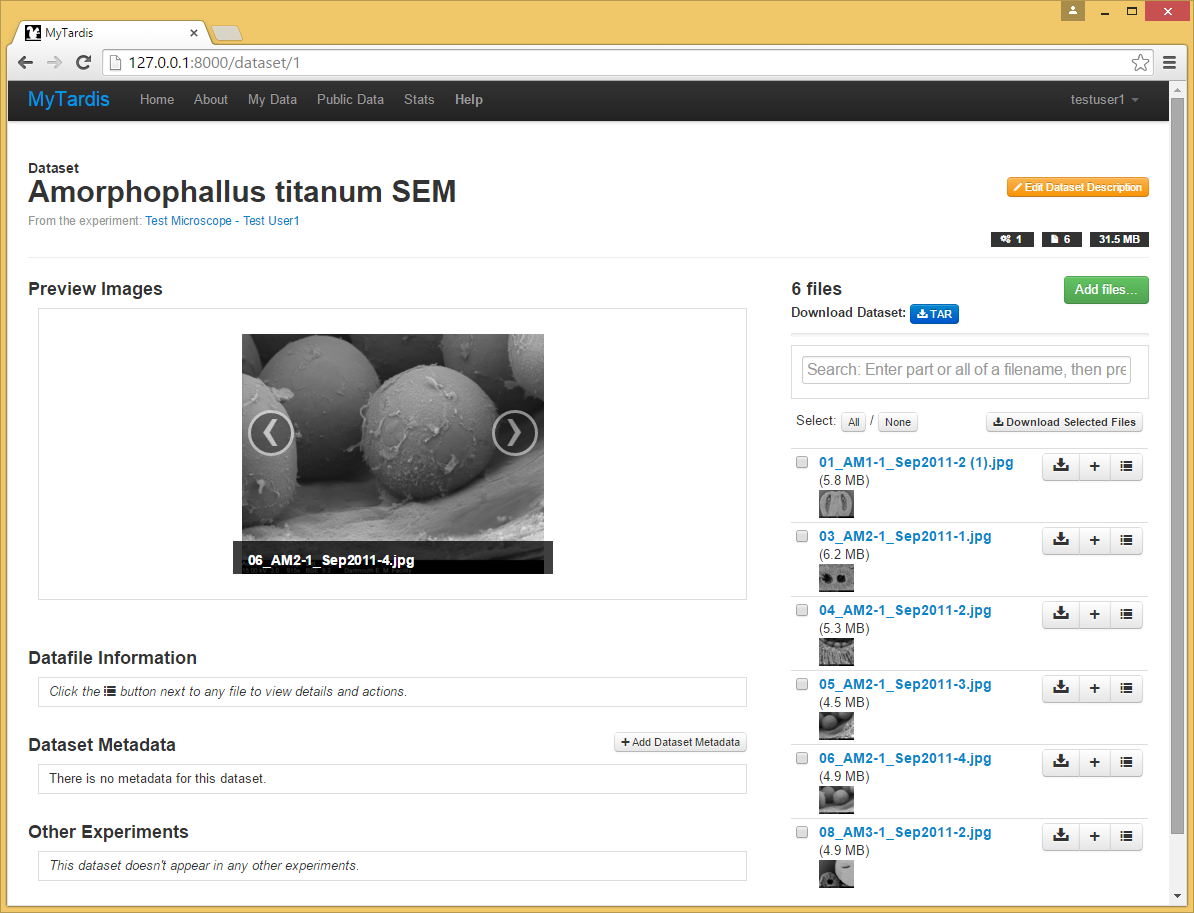
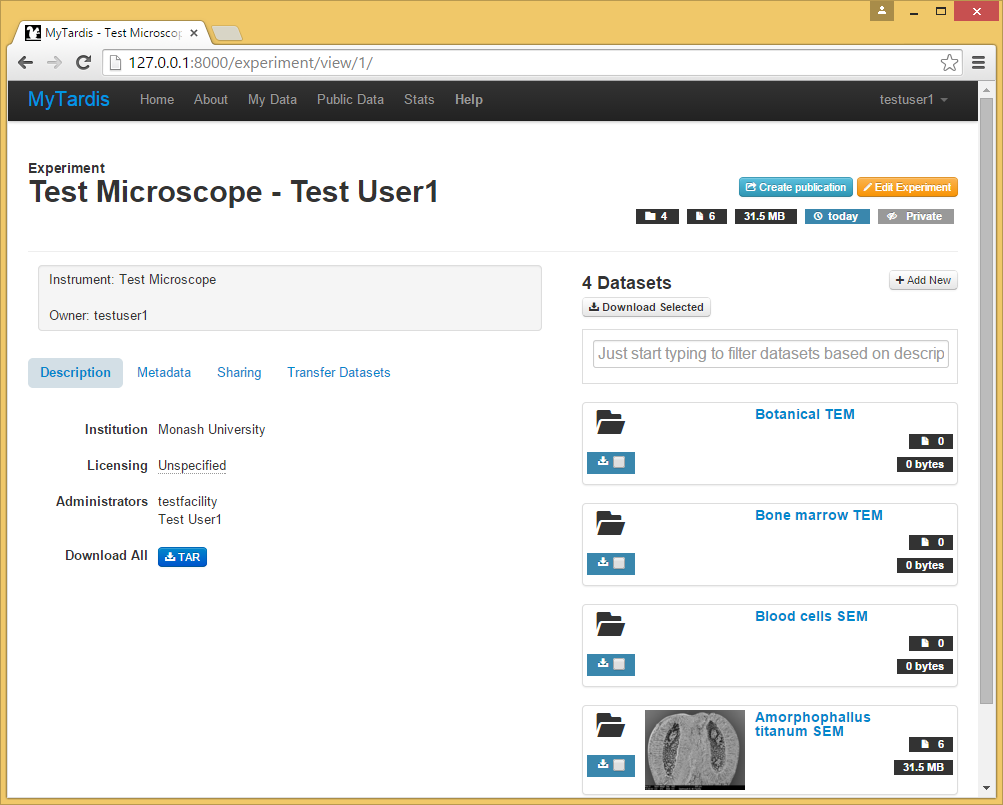
For the test server, we are using the CELERY_ALWAYS_EAGER setting which means that datafiles will be verified immediately, instead of as a background task. This explains why the number of verified datafiles below is always equal to the total number of datafiles for each dataset. In the screenshot below, only 6 datafiles have been uploaded from the “Amorphophallus Titanum SEM” dataset, and no datafiles have been uploaded from the other datasets yet.
MyTardis’s “My Data” View from a Facility Manager’s Perspective
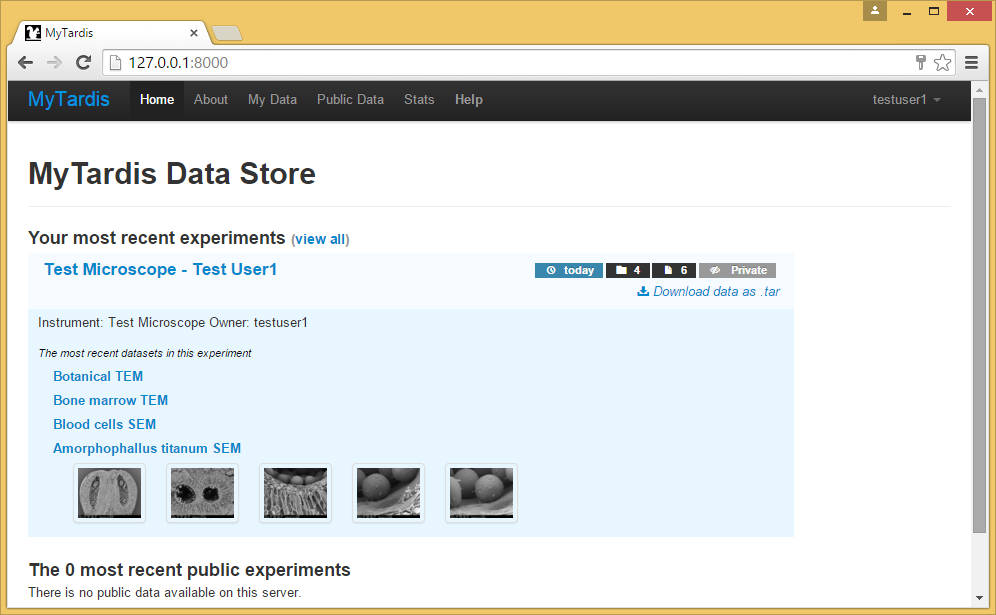
While logged in as “testfacility” (an account whose credentials could be shared amongst the managers of “Test Facility”), click on “My Data” to see all of the “experiments” (dataset collections) created by MyData while running at that facility. MyData’s default dataset grouping uses the instrument name (“Test Microscope”) and the user’s full name (e.g. “Test User1”) to define a MyTardis “experiment” record, as seen in MyTardis’s “My Data” view below.

MyTardis from a Facility User’s Perspective
Log out of MyTardis, and log back in with the username “testuser1” and password “testuser1”. Now you only see the data collected by user “testuser1”, not the data collected by “testuser2”. The “Test User1” in the experiment (dataset group) names may seem redundant here, but users can share their experiments with other users, so it would be confusing if all of the shared experiments were just given a default name of “Test Microscope”.
Click on the “Test Microscope - Test User1” experiment to see the datasets included in that experiment:
Click on the “Amorphophallus Titanum SEM Dataset” to see the datafiles in that dataset: